
How to Read a Home Inspection Report: A Step-by-Step Guide
Learn how to read a home inspection report, prioritize findings, and understand severity labels to make informed home buying decisions.
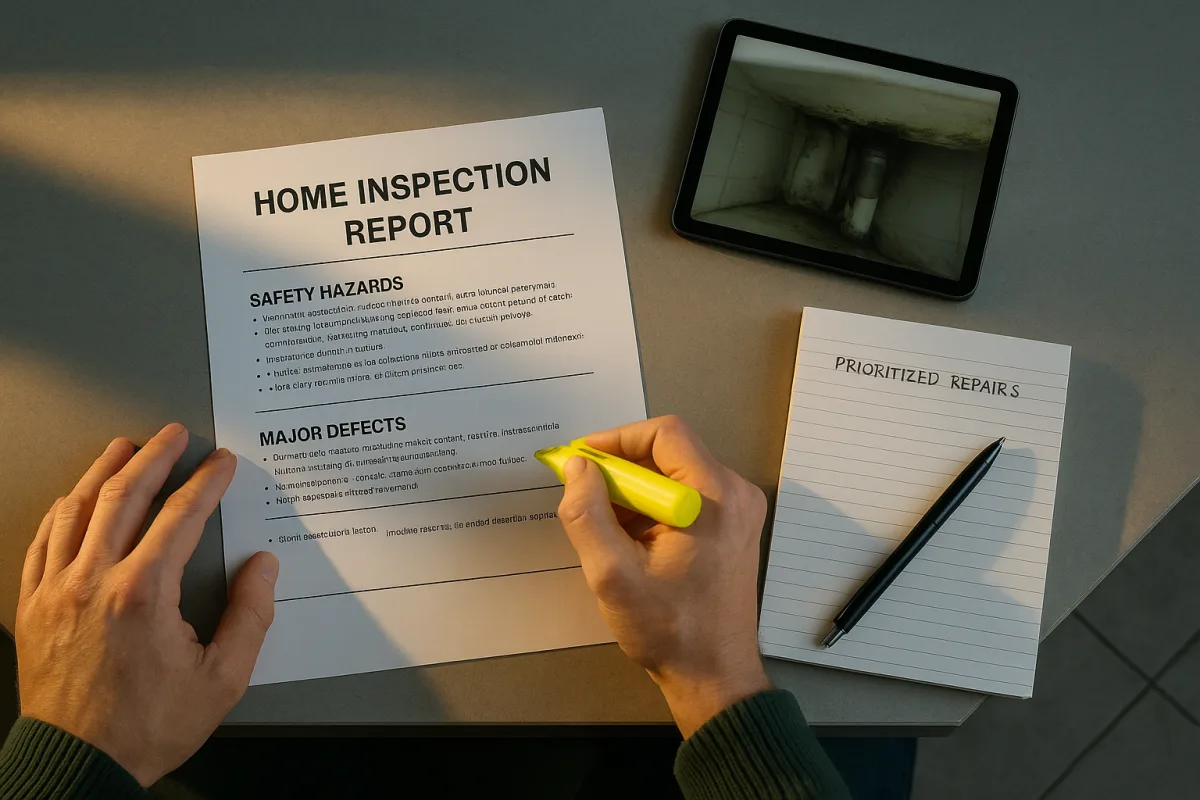
Start with the report summary
The report summary is usually the first page that catches your eye: a condensed list of defects, safety concerns, and recommended follow-up. Read it first, but do not stop there. The detailed sections explain where the problem is, what the inspector saw, and why it was flagged. [3][4]
Check the cover page before you analyze defects. It should identify the property, inspection date, inspector credentials, and often the inspection scope. Report layouts and terminology vary by inspector, home type, and region, even when inspectors use standardized checklists aligned with ASHI or InterNACHI standards. [1][2]
We would make a separate list of every summary item, with its report page number beside it. That keeps a long report from becoming a blur of photos, checkboxes, and repeated notes.
Learn the inspector’s severity labels
Find the report’s rating key before assigning importance to any finding. Many reports sort issues as safety hazards, major defects, minor defects, and maintenance items. Other systems combine severity, from critical through low, with categories such as safety and integrity or comfort and cosmetic. [3][6]
A safety hazard describes an immediate risk of injury or death and needs attention before occupancy. A major defect affects structure or habitability, or may do so, and generally calls for prompt evaluation by the appropriate specialist. [3][14]
Minor defects still need repairs, but usually do not create an immediate safety risk. Maintenance items are deferred routine upkeep, often lower-cost work such as sealing, cleaning, adjusting, or monitoring a component. [3][14]
Do not assume every item in bold type carries the same risk. A cracked outlet cover, a roof leak, and a foundation concern may each appear on the summary, but their urgency, repair path, and cost exposure are very different.
Read the full finding, including its location and limitation
A useful defect entry tells you the component, its condition, location, observed deficiency, urgency, and recommended next step. Photos help identify the issue, but the written description is where you learn whether the inspector observed active damage, a possible concern, or a condition needing further evaluation. [1][5]
Look for limiting language such as “visible,” “accessible,” or “recommend further evaluation.” A general home inspection is based on what the inspector can observe during the appointment, not a guarantee about concealed wiring, buried pipes, or conditions behind finished walls. [4][16]
Copy the exact wording for significant items instead of reducing it to “bad roof” or “foundation issue.” “Evidence of moisture at ceiling” and “active roof leak observed” describe different conditions, even if both lead you to ask roof-related questions.
Work through the house systems in report order
Most reports divide the property into familiar systems: structural elements, roofing, exterior, interior, electrical, plumbing, HVAC, attic and insulation, basement or crawlspace, garage, kitchen, bathrooms, and built-in appliances. [2][4]
Begin with structural systems, roofing, drainage, electrical, plumbing, and HVAC. These areas can affect safety, habitability, or expensive core components, while interior finishes and dated fixtures often belong lower on the immediate list. [14][15]
For the structure, identify the foundation type, visible framing, cracks, movement, and signs of water intrusion. Not every crack signals a structural failure. The report should distinguish observed cracking from a condition that requires structural evaluation. [3][14]
On the exterior, connect drainage comments to the house rather than reading them as isolated landscaping notes. The report may cover grading, walkways, drainage patterns, siding, and exterior penetrations, all of which can relate to moisture reaching the foundation or interior. [2][5]
Put roof findings into a repair range
Read the roofing section alongside the attic and insulation section. The roof entry may describe material, apparent condition, flashing, gutters, ventilation, damage, and age, while the attic may reveal staining, moisture, insulation gaps, or ventilation concerns. [2][4]
A minor roof repair is estimated at about $300 to $1,500. A full roof replacement is estimated at roughly $9,000 to $25,000 or more, with the final figure varying by location, roof size, material, and damage extent. [7][8]
Separate a repairable defect from an end-of-life roof. Missing or damaged flashing, a localized leak, and worn roofing across the whole structure can all appear under “roofing,” but they do not create the same budget need.
Treat electrical and plumbing findings as safety and access issues
Read the electrical section for the service panel, wiring, breakers, outlets, and visible safety concerns. Electrical findings can range from a relatively contained double-tapped breaker, estimated at $150 to $400 to correct, to a panel replacement estimated at $1,800 to $4,000. [7][8]
A double-tapped breaker means more than one conductor is connected where the breaker is designed for one. The report should identify the panel or circuit location, so you can ask an electrician to evaluate the specific observed condition. [3][5]
In plumbing, look for pipe materials, fixture operation, visible leaks, water pressure observations, and drainage comments. A report can identify evidence of a leak or a fixture problem, but inaccessible pipes and concealed conditions may require further investigation. [2][4]
Leaks belong near the top of your list because water can affect finishes, framing, and electrical areas. Do not dismiss a moisture-related notation as cosmetic until you know whether the source is active and whether damage has spread. [14][15]
Compare HVAC age, condition, and performance notes
The HVAC section should identify heating, cooling, ventilation, visible component condition, recommended repairs, and system age where available. Read age against the typical 15- to 20-year expected lifespan, not as an automatic replacement deadline. [9][10]
Older furnaces may have annual fuel utilization efficiency, or AFUE, ratings around 60% to 70%, while modern units can reach 95% to 98%. Older air conditioners may be rated around SEER 8 to 10, compared with a modern minimum of 15 and high-efficiency systems around 20 to 25. [9][10]
A system can be old and functioning, or newer and poorly maintained. The report’s operational comments, visible condition, repair recommendations, efficiency information, and estimated remaining lifespan give you a fuller picture than age alone. [9][10]
Annual HVAC inspections are commonly recommended. Evidence linking maintenance directly to a longer equipment lifespan is limited, so do not read a maintenance recommendation as a promise that an aging system will last a particular number of additional years. [9][10]
Read moisture, cracks, and insulation for your climate
Moisture and cracking need local context. In humid climates, condensation from air conditioning can contribute to summer mold conditions, making moisture readings and descriptions of water intrusion especially important. [11][12]
In cold climates, freeze-thaw cycles can contribute to cracking, and ice dams can point to insulation or air-sealing problems. Winter inspections may also allow the inspector to assess heating performance while the system is operating under actual seasonal demand. [11][13]
If the report identifies staining, dampness, mold-like growth, or repeated moisture concerns, focus first on the source of water. Cosmetic repair without correcting intrusion, drainage, condensation, or a leak leaves the underlying issue unresolved. [14][16]
Foundation crack costs illustrate why the description matters. Non-structural epoxy injection is estimated at $500 to $1,500, while structural repairs are estimated at $8,000 to $30,000 or more. [7][8]
Separate repair needs from cosmetic preferences
Dated fixtures, worn paint, minor wall cracks, and cosmetic finishes can make a report feel alarming because they add up across many pages. They may affect your move-in work list, but they do not belong in the same urgency category as exposed electrical hazards, active leaks, or major system failures. [14][17]
Use three lists: work tied to safety, work tied to water or major systems, and work you would handle as routine ownership. This method prevents small visible items from crowding out a roof, electrical, plumbing, HVAC, or structural concern. [14][15]
We would skip negotiating from a vague collection of cosmetic notes. Keep attention on findings that affect safety, habitability, material repair cost, or the need for a specialist opinion.
Get specialist answers before assigning a final cost
A general inspector can identify conditions that need more analysis, but some findings need a licensed or specialized professional. Reports commonly recommend further evaluation for suspected structural movement, electrical concerns, roofing defects, pests, mold, or system conditions beyond visual inspection. [14][16]
Ask the specialist to address the exact report item: what caused it, whether it is active, what repair is required, and what the repair estimate includes. A quote should clarify labor, materials, permits if needed, related damage repair, and whether additional work could be uncovered after access is opened.
Specialized tests can also change the timeline. Radon testing commonly adds time, with results typically available three to five business days after the inspection, while mold testing may require additional turnaround beyond the general inspection report. [19][20]
Build your response around timing and evidence
A typical on-site home inspection takes two to four hours. Reports usually arrive within 24 to 48 hours, though some companies deliver them within three hours to 24 hours and larger or more complex properties can take three to four business days. [19][20][21]
Once the report arrives, flag safety hazards and major defects first, then arrange any recommended specialist evaluations. Keep the inspection report, specialist findings, photos, and written estimates together so each request or discussion ties back to a documented condition. [16][17]
Do not wait for perfect certainty before organizing the paperwork. Start with the pages that identify active water, electrical safety issues, structural concerns, and major equipment conditions, then work down through the remaining repair and maintenance items.
Frequently Asked Questions
How do I prioritize issues in a home inspection report?
Begin by reviewing the report summary, which lists defects, safety concerns, and recommended follow-up. Focus first on safety hazards and major defects, then address minor defects and maintenance items. Treat the report as a prioritized repair list rather than a pass-or-fail judgment on the home.
What do safety hazard labels mean in a home inspection report?
Safety hazards indicate immediate risks of injury or death that require attention before occupancy. These are the highest priority issues. Major defects affect the structure or habitability and usually need prompt evaluation by specialists, while minor defects and maintenance items involve less urgent repairs.
How should I interpret limitations noted in a home inspection report?
Limitations often include terms like “visible,” “accessible,” or “recommend further evaluation,” indicating the inspector’s observations were limited to what could be seen during the inspection. The report does not guarantee conditions behind walls or underground, so some issues may require specialist follow-up for a complete assessment.
What steps should I take after reading a home inspection report?
After reading the full report, consider getting specialist evaluations for concerns beyond the general inspector’s scope, such as suspected mold, pests, or structural problems. Use the report to create a prioritized repair plan, focusing on safety hazards and major defects first, and then plan for minor repairs and maintenance.
How do I estimate repair costs from a home inspection report?
Estimate repair costs by considering the type and severity of the defect. For example, roof replacements can range from $9,000 to $25,000 or more, while structural foundation repairs may exceed $30,000. Use these benchmarks to understand potential financial exposure before negotiating repairs or making decisions.
How we researched this
This article was assembled from 21 cited references.
Nothing here is based on hands-on testing. Where a figure or finding appears, it belongs to the source cited beside it, and the writing says so rather than implying otherwise. Every source is listed below so you can check it.
Sources
- How to Write a Home Inspection Report (Complete 2026 Guide)
- Common Home Inspection Report Sections Explained
- How to Read and Understand Your Home Inspection Report
- Home Inspection Sample Report: Sections Explained - InspectandTest
- How to Read a Home Inspection Report: Section by Section Guide | inspectorwatch.com
- Home Inspection Report: Read, Prioritize, Act, HomeCommand
- How Much Do Home Inspection Repairs Cost in 2026? | HomeInspectionCosts.com
- How Much Do Home Inspection Repairs Cost? (2026 Guide)
- HVAC Inspection: What It Is, Cost & What to Expect
- HVAC Inspection: What It Is & What to Expect
- How Local Climate Conditions Influence the Home Inspection Process - SafeGuard Home Inspection
- Think winter is bad? Why summer is actually peak mold season (and how to protect your home)
- How Climate Shapes Home Repairs by Region | HomeSymptom
- First-Time Buyer Guide to Reading Home Inspection Report: What’s Critical vs Cosmetic, Journey Home Inspections
- Top Things that Fail Home Inspections | Chase
- What To Do When Your Home Inspection Report Highlights Problems
- The Home Inspection: Do’s and Don’ts for Home Buyers - NerdWallet
- 3 tips for buyers ahead of a home inspection
- How soon will I receive my home inspection report? - Structure Tech Home Inspections
- How Long To Receive Inspection Report? - InsideAndOutInspection
- Home Inspection Report: What It Contains and Costs - LegalClarity
Related Articles
How to Read a Real Estate Listing: A Buyer’s Guide
Learn how to read a real estate listing, interpret terms, prices, and abbreviations to make informed home buying decisions.
How to Read a Property Deed and Understand Its Sections
Learn how to read a property deed, understand ownership, legal descriptions, and key sections to know what you truly own.

How to Find a Good Home Inspector: Tips and Licensing Info
Learn how to find a good home inspector by verifying licenses, comparing costs, and reviewing sample reports before hiring.

Buying a Home in a Historic District: What You Need to Know
Learn key rules, costs, inspections, and approval processes when buying a home in a historic district.